Info
Copyright © 2021-2026 Robert Winkler
This book is licensed under the Creative Commons BY-NC-SA 4.0 which summarized means:
You are free to:
-
Share — copy and redistribute the material in any medium or format
-
Adapt — remix, transform, and build upon the material
-
The licensor cannot revoke these freedoms as long as you follow the license terms.
Under the following terms:
-
Attribution — You must give appropriate credit, provide a link to the license, and indicate if changes were made. You may do so in any reasonable manner, but not in any way that suggests the licensor endorses you or your use.
-
NonCommercial — You may not use the material for commercial purposes.
-
ShareAlike — If you remix, transform, or build upon the material, you must distribute your contributions under the same license as the original.
-
No additional restrictions — You may not apply legal terms or technological measures that legally restrict others from doing anything the license permits.
The repo for the book, where you can get the code referenced and report any errors (submit an issue or even a pull request) is here. The code is MIT licensed.
If you’re interested in contacting me regarding MIPS tutoring or any other business request related to the book, you can reach me at books@robertwinkler.com.
Dedication
This book is dedicated to all its supporters and all the students I’ve helped with MIPS over the years who inspired me to create it.
Thank you.
An extra thank you goes to the corporate level sponsors below:
|
|
Chapter 0: Hello World
In which we lay the groundwork for the rest of the book…
Prereqs
While someone with no programming experience could probably learn MIPS from this book, it is definitely preferable to have at least some experience in a higher level imperative programming language. I say imperative, because programming in assembly is the antithesis of functional programming; everything is about state, with each line changing the state of the CPU and sometimes memory. Given that, experience in functional languages like Lisp, Scheme etc. are less helpful than experience in C/C++, Java, Python, Javascript etc.
Of all of the latter, C is the best, with C++ being a close second because at least all of C exists in C++. There are many reasons C is the best prior experience when learning assembly (any assembly, not just MIPS), including the following:
-
pointers, concepts and symmetry of "address of" and "dereference" operators
-
pointer/array syntax equivalence
-
stack allocation as the default
-
manual memory management, no garbage collector
-
global data
-
rough equivalence in structure of a C program and an assembly program (vs. say Java)
-
pass by value
There is some overlap between those and there are probably more, but you can see that most other languages that are commonly taught as first languages are missing most, if not all of those things.
Even C++, which technically has all of them, being a superset of C, is usually taught in a way that mostly ignores all of those things. They teach C++ as if it’s Java, never teaching the fundamentals. In any case this is getting into my problems with CS pedagogy of the last 20 years based on my experience as a CS major myself ('12) and as a programming tutor helping college students across the country since 2016, and I should save it for a proper essay/rant sometime.
Long story short, I use C code and C syntax to help explain and teach MIPS. I’ll try to provide enough explanation regardless of past experience as best I can.
System Setup
As I tell all of my tutoring students, if you’re majoring in CS or anything related I highly recommend you use Linux. It’s easier in every way to do dev work on Linux vs Windows or Mac. Many assignments require it, which often necessitates using a virtual machine (which is painful, especially on laptops) and/or ssh-ing into a school Linux server, which is also less than ideal. In general, you’ll have to learn how to use the Unix terminal eventually and will probably use it to some extent in your career so it also makes sense to get used to it asap.
That being said, Windows does now have WSL so you can get the full Ubuntu or Debian or Fedora etc. terminal based system on Windows without having to setup a real virtual machine (or dealing with the slowdown that would cause). I’ve even heard that they’ll get support for Linux GUI programs soon.
MacOS on the other hand, is technically a Unix based system and you can use their terminal and install virtually any program from there using Macports or Homebrew or similar.
There are 3 commonly used MIPS simulators that I know of:
-
SPIM is probably the oldest and is terminal only
-
QtSpim is a GUI front end for SPIM
-
MARS is a Java GUI based simulator with dozens of extra syscalls, syntactic sugar and features like graphics, memory mapped I/O, etc.
SPIM and QtSpim are in the Debian/Ubuntu repos so you can install them with the following
$ sudo apt install qtspim spimYou can probably find them in the repos for other distros too and install them similarly.
If it’s not in your repos or you’re on Windows (and not using WSL) or Mac you can download them, and MARS at these addresses
Handy Resources
There are a few references that you should bookmark (or download) before you get started. The first is the MIPS Greensheet. It’s possible you already have a physical copy of this as it’s actually the tearout from the Patterson and Hennessey textbook Computer Organization and Design MIPS Edition that is commonly used in college courses.
The second thing is the list of syscalls from the MARS website.
I recommend you download/bookmark both and keep them open while working because you’ll be referencing them often to remind yourself which instructions and syscalls you have available and how they work.
Hello World
Let’s start with the classic hello world program, first in C, then in MIPS, and go over all the pieces in overview. You can copy paste these into your editor of choice (mine being neovim), or use the files in the associated repo to follow along.
1
2
3
4
5
6
7
#include <stdio.h>
int main()
{
printf("Hello World!\n");
return 0;
}
It is pretty self explanatory. You have to include stdio.h so you can use the function printf (though in the real world I’d use puts here), the function main is the start of any C/C++ program, which is a function that returns an int. We call printf to display the string "Hello World!\n" to the user and then return 0 to exit. Returning 0 indicates success and there were no errors.
You can compile and run it in a linux/unix terminal as shown below. You can substitute clang or another compiler for gcc if you want.
$ gcc -o hello hello.c
$ ./hello
Hello World!
Now, the same program in MIPS:
1
2
3
4
5
6
7
8
9
10
11
.data
hello: .asciiz "Hello World!\n"
.text
main:
li $v0, 4 # load immediate, v0 = 4 (4 is print string system call)
la $a0, hello # load address of string to print into a0
syscall
li $v0, 10 # exit syscall
syscall
The .data section is where you declare global variables, which includes string
literals as in this case. We’ll cover them in more detail later.
The .text section is where any code goes. Here we declare a single label main:,
indicating the start of our main function.
We then put the number 4 in the $v0 register to select the print string system
call. The print string system call takes one argument, the address of the string
to print, in the $a0 register. We do that on the next line. On line 8, we call
the system call using the syscall instruction.
Finally we call the exit system call which takes no arguments and exits the program.
Again, we’ll cover system calls in a later chapter. This is just an intro/overview so don’t worry if some things aren’t completely clear. This chapter is about getting you up and running, not really about teaching anything specific yet.
Building and Running
Now that we have our hello world MIPS program, how do we run it? Well the easiest and quickest[1] way is of course to do it on the command line, which can be done like this for spim:
$ spim -file hello.s
SPIM Version 8.0 of January 8, 2010
Copyright 1990-2010, James R. Larus.
All Rights Reserved.
See the file README for a full copyright notice.
Loaded: /usr/lib/spim/exceptions.s
Hello World!
or this for MARS:
$ java -jar ~/Mars4_5.jar hello.s
MARS 4.5  Copyright 2003-2014 Pete Sanderson and Kenneth Vollmar

Hello World!
The name of your MARS jar file may be different[2], so be sure to use the correct name and path. For myself, I keep the jar file in my home directory so I can use tilde to access it no matter where I am. You can also copy it into your working directory (ie wherever you have your source code) so you don’t have to specify a path at all. There are lots of useful command line options that you can use[3], some of which we’ll touch on later.
Running the jar directly on the command line works even in the DOS command line though I’ve never done it and it’s probably not worth it.
Alternatively, you can start up MARS or QtSpim like a normal GUI application and then load your source file. MARS requires you to hit "assemble" and then "run". Whereas with QtSpim you only have to hit "run".
QtSpim does let you start and load the file in one step from the command line
$ qtspim hello.sbut there is no way to simply run it with out starting the GUI, which makes sense since the whole point is to be a GUI wrapper around spim.
Conclusion
Well, there you have it, you have written and run your first MIPS program. Another few chapters and you will have no trouble with almost anything you would want to do in MIPS, whether for a class, or on your own for fun.
Chapter 1: Data
In MIPS, you can declare global variables in the .data section.
At a minimum, this is where you would declare/define any literal strings your program will be printing, since virtually every program has at least 1 or 2 of those.
When declaring something in the .data section, the format is
variable_name: .directive value(s)
where whitespace between the 3 is arbitrary. The possible directives are listed in the following table:
| Directive | Size (bytes) | C equivalent |
|---|---|---|
.byte |
1 |
char |
.half |
2 |
short |
.word |
4 |
int, all pointer types |
.float |
4 |
float |
.double |
8 |
double |
.ascii |
NA |
char str[5] = "hello"; (no '\0') |
.asciiz |
NA |
char str[] = "hello"; (includes the '\0') |
.space |
NA |
typeless, unitinialized space, can be used for any type/array |
As you can see it’s pretty straightforward, but there are a few more details about actually using them so let’s move onto some examples.
Say you wanted to convert the following simple program to MIPS:
1
2
3
4
5
6
7
8
9
10
11
#include <stdio.h>
int main()
{
char name[30];
int age;
printf("What's your name and age?\n");
scanf("%s %d", name, &age);
printf("Hello %s, nice to meet you!\n", name);
return 0;
}
The first thing you have to remember when converting from a higher level language
to assembly (any assembly), is that what matters is whether it is functionally
the same, not whether everything is done in exactly the same way.[4]
In this instance, that means realizing that your literal strings and your local
variables name and age become globals in MIPS.
1
2
3
4
5
6
7
8
9
10
11
12
.data
age: .word 0 # can be initialized to anything
ask_name: .asciiz "What's your name and age?\n"
hello_space: .asciiz "Hello "
nice_meet: .asciiz ", nice to meet you!\n"
name: .space 30
.text
# main goes here
As you can see in the example, we extract all the string literals and
the character array name and int age and declare them as MIPS globals.
One thing to note is the second printf. Because it prints a variable, name,
using the conversion specifier, we break the literal into pieces around that.
Since there is no built-in printf function in MIPS, you have to handle printing
variables yourself with the appropriate system calls.
Arrays
Obviously strings are special cases that can be handled with .ascii or .asciiz
for literals, but for other types or user inputed strings how do we do it?
The first way, which was demonstrated in the snippet above is to use .space
to declare an array of the necessary byte size. Keep in mind that the size is
specified in bytes not elements, so it only matches for character arrays. For
arrays of ints/words, floats, doubles etc. you’d have to multiply by the sizeof(type).
"But, .space only lets you declare uninitialized arrays, how do I do initialized ones?"
Actually, it appears .space initializes everything to 0 similar to global/static
data in C and C++, though I can’t find that documented anywhere.
Aside from that, there are two ways depending on whether you want to initialize every element to the same value or not.
For different values, the syntax is an extension of declaring a single variable
of that type. You specify all the values, comma separated. This actually gives
you another way to declare a string or a character array, though I can’t really
think of a reason you’d want to. You could declare a .byte array and list all
the characters individually.
However, if you want an array with all elements initialized to the same value there
is a more convenient option. After the type you put the value you want, a colon,
and then the number of elements. So a: .word 123 : 10
would declare a 10 integer array with all elements set to 123. This works for all
types in MARS, but SPIM does not support this syntax for floats and doubles. Since
you’ll probably not have to deal with floating point types at all, let alone arrays
of them initialized to a particular value, this isn’t a huge loss.
Given what we just covered, this:
1
2
3
4
5
int a[20];
double b[20];
int c[10] = { 9,8,7,6,5,4,3,2,1,0 };
int d[5] = { 42, 42, 42, 42, 42 };
char e[3] = { 'a', 'b', 'c' };
becomes
1
2
3
4
5
6
.data
a: .space 80
b: .space 160
c: .word 9,8,7,6,5,4,3,2,1,0
d: .word 42 : 5
e: .byte 'a', 'b', 'c'
For more examples of array declarations, see array_decls.s. You don’t have to understand the rest of the code, just that it prints out each of the arrays.
Exercises
-
Create a MIPS data section that declares variables equivalent to the following. This will not be a runnable program without a main.
1
2
3
4
5
6	float a;
	float b = 2.71;
	int myarray[10] = { 9, 8, 7, 6, 5, 4, 3, 2, 1 };
	short array2[10];

	char mips_str[] = "MIPS assembly is awesome!";
-
How would you declare an array of 500 points? The point structure is tightly packed and defined like this:
1 2 3 4 5
struct point { float x; float y; float z; };
Chapter 2: System Calls
We mentioned system calls (aka syscalls from now on) in chapter 0 when we were going over our "Hello World" program, but what exactly are they?
Essentially, they are the built in functions of an operating system; in this case, the simple operating system of the MIPS simulators. They provide access to all the fundamental features, like input and output to/from both the console and files, allocating memory, and exiting. That covers all the 17 syscalls supported by spim, but MARS supports many more, for things ranging from playing MIDI sounds, to getting a random number, to creating GUI dialogs.[5]
|
Note
|
Except for the MARS or SPIM specific chapters/sections, I’ll be sticking to code compatible with both throughout this book, meaning we only use the first 17 syscalls, and don’t get to use some of the syntactic sugar available in MARS, or any SPIM specific features either. |
| Name | $v0 | Arguments | Result |
|---|---|---|---|
print integer |
1 |
$a0 = integer to print |
|
print float |
2 |
$f12 = float to print |
|
print double |
3 |
$f12 = double to print |
|
print string |
4 |
$a0 = address of string |
|
read integer |
5 |
$v0 = integer read |
|
read float |
6 |
$f0 = float read |
|
read double |
7 |
$f0 = double read |
|
read string |
8 |
$a0 = address of input buffer |
works like C’s fgets |
sbrk |
9 |
$a0 = size in bytes to allocate |
$v0 = address of allocated memory (sbrk is basically malloc but there is no free) |
exit |
10 |
program terminates |
|
print character |
11 |
$a0 = character to print (ascii value) |
|
read character |
12 |
$v0 = character read |
|
open file |
13 |
$a0 = address of filename |
$v0 = file descriptor (negative if error) |
read from file |
14 |
$a0 = file descriptor |
$v0 = number of characters read, 0 for end-of-file, negative for error |
write to file |
15 |
$a0 = file descriptor |
$v0 = number of characters written, negative for error |
close file |
16 |
$a0 = file descriptor |
|
exit2 |
17 |
$a0 = termination result |
program terminates, returning number in $a0 (only meaningful when run in the terminal, ignored in GUI) |
As you can see, they really only cover the basics. You can read or write the different types, do file I/O using calls identical to POSIX functions (open, read, write, close; see man pages), allocate memory, and exit. Even so, they’re sufficient to build anything you want.
So, what does that table mean? How do these actually work?
The process is:
-
Put the number for the syscall you want in
$v0 -
Fill in the appropriate arguments, if any
-
Execute the syscall with
syscall
1
2
3	li    $v0, 1   # 1 is print integer
	li    $a0, 42  # takes 1 arg in a0, the number to print
	syscall        # actually execute syscall
You can think of the above as print_integer(42);. Let’s look at an actual
program that uses a few more syscalls next.
Examples
1
2
3
4
5
6
7
8
9
10
11
12
13
14
15
16
17
18
19
20
21
22
#include <stdio.h>
int main()
{
int age;
int height;
char name[50];
printf("What's your name? ");
fgets(name, 50, stdin);
printf("Hello %s", name);
printf("How old are you? ");
scanf("%d", &age);
printf("Enter your height in inches: ");
scanf("%d", &height);
printf("Your age + height = %d\n", age + height);
return 0;
}
I’m using fgets() instead of scanf("%s", name) because fgets works the same as the
read string syscall (8).
1
2
3
4
5
6
7
8
9
10
11
12
13
14
15
16
17
18
19
20
21
22
23
24
25
26
27
28
29
30
31
32
33
34
35
36
37
38
39
40
41
42
43
44
45
46
47
48
49
50
51
52
53
54
55
56
57
58
59
60
61
62
63
64
65
.data
name: .space 50
nameprompt: .asciiz "What's your name? "
hello_space: .asciiz "Hello "
how_old: .asciiz "How old are you? "
ask_height: .asciiz "Enter your height in inches: "
ageplusheight: .asciiz "Your age + height = "
.text
main:
li $v0, 4 # print string system call
la $a0, nameprompt # load address of string to print into a0
syscall
li $v0, 8 # read string
la $a0, name
li $a1, 50
syscall
li $v0, 4
la $a0, hello_space
syscall
la $a0, name # note 4 is still in $v0
syscall
# don't print a newline here because
# one will be part of name
li $v0, 4
la $a0, how_old
syscall
li $v0, 5 # read integer
syscall
move $t0, $v0 # save age in t0
li $v0, 4
la $a0, ask_height
syscall
li $v0, 5 # read integer
syscall
add $t0, $t0, $v0 # t0 += height
li $v0, 4
la $a0, ageplusheight
syscall
li $v0, 1 # print int
move $a0, $t0 # a0 = age + height
syscall
# print newline
li $v0, 11 # print char
li $a0, 10 # ascii value of '\n'
syscall
li $v0, 10 # exit syscall
syscall
There a few things to note from the example.
We don’t declare global variables for age or height. We could, but there’s no reason
to since we need them in registers to perform the addition anyway. Instead, we
copy/save age to $t0 so we can use $v0 for 2 more syscalls,
then add height to $t0.
This is generally how it works. Use registers for local variables unless required to do otherwise. We’ll cover more about register use when we cover the MIPS calling convention.
Another thing is when we print their name, we don’t put 4 in $v0 again because it
is still/already 4 from the lines above. Unless the syscall says it writes to $v0
you can assume it is unmodified.
Lastly, many people will declare a string "\n" and use print string to print a newline,
but it’s easier to use the print char syscall as we do right before exiting.
Exercises
-
Convert the following C code to MIPS
1 2 3 4 5 6 7 8 9 10 11 12 13 14 15 16 17 18 19 20
#include <stdio.h> int main() { float price; double golden = 1.618; int ret; printf("Enter what the price of gas was last time you filled up: "); scanf("%f", &price); printf("%f is too expensive!\n", price); printf("The golden ratio is roughly %f\n", golden); printf("Enter an integer for the program to return: " scanf("%d", &ret); return ret; }
-
Write a program that asks the user for their name, reads it in, and then prints "Hello [user’s name]!"
Chapter 3: Branches and Logic
We can’t go much further in our MIPS programming journey without covering branching.
Almost every non-trivial program requires some logic, even if it’s only a few if or
if-else statements. In other words, almost every program requires branching, a way
to do a instead of b, or to do a only if certain conditions are met.
You already know how to do this in higher level languages, the aforementioned if
statement. In assembly it’s more complicated. Your only tool is the ability
to jump to a label on another line based on the result of various comparisons. The
relevant instructions are listed in the following table:
| Name | Opcode | Format | Operation |
|---|---|---|---|
Branch On Equal |
beq |
beq rs, rt, label |
if (rs == rt) goto label |
Branch On Not Equal |
bne |
bne rs, rt, label |
if (rs != rt) goto label |
Branch Less Than |
blt |
blt rs, rt, label |
if (rs < rt) goto label |
Branch Greater Than |
bgt |
bgt rs, rt, label |
if (rs > rt) goto label |
Branch Less Than Or Equal |
ble |
ble rs, rt, label |
if (rs ⇐ rt) goto label |
Branch Greater Than Or Equal |
bge |
bge rs, rt, label |
if (rs >= rt) goto label |
Set Less Than |
slt |
slt rd, rs, rt |
rd = (rs < rt) ? 1 : 0 |
Set Less Than Immediate |
slti |
slt rd, rs, imm |
rd = (rs < imm) ? 1 : 0 |
Set Less Than Immediate Unsigned |
sltiu |
slt rd, rs, imm |
rd = (rs < imm) ? 1 : 0 |
Set Less Than Unsigned |
sltu |
sltu rd, rs, rt |
rd = (rs < rt) ? 1 : 0 |
You can see the same information and more (like which ones are pseudoinstructions) on the MIPS greensheet.[6]
There are additional pseudoinstructions in the form of beq/bne/blt/bgt/ble/bge + 'z' which are syntactic sugar to compare a register against 0, ie the 0 register.
So the following:
	beq     $t0, $0, label
	bne     $t1, $0, label
	blt     $t2, $0, label
would be equivalent to:
	beqz    $t0, label
	bnez    $t1, label
	bltz    $t2, label
Note $0 is the same as zero and is the hard coded 0 register. I’ll cover
registers in more detail in the chapter on functions and the calling conventions.
One final thing is that labels have the same naming requirements as C variables and functions. They must start with a letter or underscore and the rest can be letters, underscores, or digits.
Practice
The rest of this chapter will be going over many examples, looking at snippets of code in C and translating them to MIPS.
Basics
Let’s start with the most basic if statement. The code in and after the if statement is arbitrary.
1
2
3
4	if (a > 0) {
		a++;
	}
	a *= 2;
Now in MIPS, let’s assume that a is in $t0. The tranlation would look
like this:
1
2
3
4	ble   $t0, $0, less_eq_0    # if (a <= 0) goto less_eq_0
	addi  $t0, $t0, 1           # a++
less_eq_0:
	sll   $t0, $t0, 1           # a *= 2  (shifting left by n is multiplying by 2^n)
There are a few things to note in this example. The first is that in assembly we test for the opposite of what was in the if statement. This will always be the case when jumping forward because (if we want to keep the same order of code) we can only jump over a block of code, whereas in C we fall into the block if the condition is true. In the process of mentally compiling a bit of C to assembly, it can be helpful to change to jump based logic first. For example the previous C would become:
1
2
3
4
5	if (a <= 0)
		goto less_eq_0;
	a++;
less_eq_0:
	a *= 2;
This is obviously still valid C but matches the branching behavior of assembly exactly. You can see I put comments for the equivalent C code in my assembly; it helps with readability to comment every line or group of lines that way.
The second thing to notice is how we handled the multiplication. This has nothing to do with branching but is something we’ll touch on multiple times throughout the book. Your job when acting as a human compiler is to match the behavior. You are under no obligation to match the structure or operations of the higher level code exactly (unless your professor stupidly forces you to).
Given that, it is in your best interest to change and rearrange things in order to simplify the assembly as much as possible to make your life easier. Generally speaking, this also tends to result in more performant code, since using fewer instructions and fewer branches (the most common outcomes) saves execution time.
In this case, the standard mult instruction (from the green sheet) would have
required 3 instructions, and even the mul instruction (that does seem to
be supported everywhere but is not on the green sheet) would take 2:
1
2
3
4
5
6
7
8	li    $t1, 2
	mult  $t0, $t1
	mflo  $t0           # a *= 2

	# or

	li    $t1, 2
	mul   $t0, $t0, $t1   # a *= 2
This is why, when multiplying or dividing by a constant power of 2 it’s common
practice to use sll or sra. This is true in all assembly languages because
multiplication and division are relatively costly operations so using shifts
when you can saves performance even if you didn’t actually save instructions.
Ok, let’s look at an if-else example. Again, the actual code is arbitrary and
we’re assuming a and b are in $t0 and $t1 respectively
1
2
3
4
5	if (a > 0) {
		b = 100;
	} else {
		b -= 50;
	}
You could do it something like these two ways
 1
 2
 3
 4
 5
 6
 7
 8
 9
10
11
12
13
14
15	bgt    $t0, $0, greater_0   # if (a > 0) goto greater_0
	addi   $t1, $t1, -50        # b -= 50
	j      less_eq_0
greater_0:
	li     $t1, 100             # b = 100
less_eq_0:

	# or

	ble    $t0, $0, less_eq0    # if (a <= 0) goto less_eq_0
	li     $t1, 100             # b = 100
	j      greater_0
less_eq_0:
	addi   $t1, $t1, -50        # b -= 50
greater_0:
You can see how the first swaps the order of the actual code which keeps the actual conditions the same as in C, while the second does what we discussed before and inverts the condition in order keep the the blocks in the same order. In both cases, an extra unconditional branch and label are necessary so we don’t fall through the else case. This is inefficient and wasteful, not to mention complicates the code unecessarily. Remember how our job is to match the behavior, not the exact structure? Imagine how we could rewrite it in C to simplify the logic:
1
2
3
4	b -= 50;
	if (a > 0) {
		b = 100;
	}
which becomes
1
2
3
4	addi   $t1, $t1, -50        # b -= 50;
	ble    $t0, $0, less_eq_0   # if (a <= 0) goto less_eq_0
	li     $t1, 100             # b = 100
less_eq_0:
That is a simple example of rearranging code to make your life easier. In this case, we are taking advantage of what the code is doing to make a default path or default case. Obviously, because of the nature of the code subtracting 50 has to be the default since setting b to 100 overwrites the original value which we’d need if we were supposed to subtract 50 instead. In cases where you can’t avoid destructive changes (like where the condition and the code are using/modifying the same variable), you can use a temporary variable; i.e. copy the value into a spare register. You still save yourself an unecessary jump and label.
Compound Conditions
These first 2 examples have been based on simple conditions, but what if you have compound conditions? How does that work with branch operations that only test a single condition? As you might expect, you have to break things down to match the logic using the operations you have.
Let’s look at and first. Variables a, b, and c are in t0, t1, and t2.
1
2
3
4	if (a > 10 && a < b) {
		c += 20;
	}
	b &= 0xFF;
So what’s our first step? Like previous examples, we need to test for the opposite when we switch to assembly, so we need the equivalent of
1
2
3
4
5	if (!(a > 10 && a < b))
		goto no_add20;
	c += 20;
no_add20:
	b &= 0xFF;
That didn’t help us much because we still don’t know how to handle that compound condition. In fact we’ve made it more complicated. If only there were a way to convert it to or instead of and. Why would we want that? Because, while both and and or in C allow for short circuit evaluation (where the result of the whole expression is known early and the rest of expression is not evaluated), with or, it short circuits on success while and short circuits on failure. What does that mean? It means that with or, the whole expression is true the second a single true term is found, while with and the whole expression is false the second a single false term is found.
Let’s look at the following code to demonstrate:
 1
 2
 3
 4
 5
 6
 7
 8
 9
10
11
12
13
14
15
16
17
18
19
20
21
22
23
24
25
26
27
28
29
30
31
32
33
34
35
36
37
38
39
40
41
42
43
44
45
46
47
48
49
50
51
52
53
54
55
56
57
58
59
60
61
62
63
64
65	if (a || b || c) {
		something;
	}

	// What does this actually look like if we rewrote it to show what it's
	// actually doing with short circuit evaluation?

	if (a) goto do_something;
	if (b) goto do_something;
	if (c) goto do_something;
	goto dont_do_something;

do_something:
	something;

dont_do_something:

	// You can see how the first success is all you need
	// Compare that with and below:

	if (a && b && c) {
		something;
	}

	if (a) {
		if (b) {
			if (c) {
				something;
			}
		}
	}
	// which in jump form is

	if (a)
		goto a_true;
	goto failure;
a_true:
	if (b)
		goto b_true;
	goto failure;

b_true:
	if (c)
		goto c_true:
	goto failure;

c_true:
	something;
failure:

	// Man that's ugly, overcomplicated, and hard to read
	// But what if we did this instead:

	if (!a) goto dont_do_something;
	if (!b) goto dont_do_something;
	if (!c) goto dont_do_something;

	something;

dont_do_something:

	// Clearly you need all successes for and.  In other words
	// to do and directly, you need state, knowledge of past
	// successes.  But what about that second translation of and?
	// It looks a lot like or?
You’re exactly right. That final translation of and is exactly like or.
It takes advantage of De Morgan’s laws.[7] For those of you who haven’t taken a Digital Logic course (or have forgotten), De Morgan’s laws are 2 equivalencies, a way to change an or to an and, and vice versa.
They are (in C notation):
!(A || B) == !A && !B
!(A && B) == !A || !B
Essentially you can think of it as splitting the not across the terms and changing the logical operation. The law works for arbitrary numbers of terms, not just 2:
(A && B && C)
is really
((A && B) && C)
so when you apply De Morgan's Law recursively you get:
!((A && B) && C) == !(A && B) || !C == !A || !B || !C
Let’s apply the law to our current compound and example. Of course the negation of greater or less than comparisons means covering the rest of the number line so it becomes:
1
2
3
4
5	if (a <= 10 || a >= b))
		goto no_add20;
	c += 20;
no_add20:
	b &= 0xFF;
which turns into:
1
2
3
4
5
6
7	li     $t9, 10
	ble    $t0, $t9, no_add20      # if (a <= 10) goto no_add20
	bge    $t0, $t1, no_add20      # if (a >= b)  goto no_add20

	addi   $t2, $t2, 20            # c += 20
no_add20:
	andi   $t1, $t1, 0xFF          # b &= 0xFF
See how that works? Or's do not need to remember state. Just the fact that you reached a line in a multi-term or expression means the previous checks were false, otherwise you’d have jumped. If you tried to emulate the same thing with an and, as you saw in the larger snippet above, you’d need a bunch of extra labels and jumps for each term.
What about mixed compound statements?
1
2
3
4	if (a > 10 || c > 100 && b >= c)
		printf("true\n");

	b |= 0xAA;
Well, the first thing to remember is that && has a higher priority than ||,
which is why most compilers these days will give a warning for the above code
about putting parenthesis around the && expression to show you meant it (even
though it’s completely legal as is).
So with that in mind, let’s change it to jump format to better see what we
need to do. While we’re at it, let’s apply De Morgan’s law to the &&.
 1
 2
 3
 4
 5
 6
 7
 8
 9
10
11	if (a > 10)
		goto do_true;
	if (c <= 100)
		goto done_if;
	if (b < c)
		goto done_if;
do_true:
	printf("true\n");

done_if:
	b |= 0xAA;
This one is trickier because we don’t flip the initial expression like normal. Instead of jumping over the body which would require testing for the opposite, we jump to the true case. We do this because we don’t want to have multiple print statements and it lets us fall through the following conditions. We would need multiple print statements because failure for the first expression is not failure for the entire expression. Here’s how it would look otherwise:
 1
 2
 3
 4
 5
 6
 7
 8
 9
10
11
12
13
14	if (a <= 10)
		goto check_and;
	printf("true\n");
	goto done_if;
check_and:
	if (c <= 100)
		goto done_if;
	if (b < c)
		goto done_if;

	printf("true\n");

done_if:
	b |= 0xAA;
That is harder to read and has both an extra print and an extra jump.
So let’s convert the better version to MIPS (a,b,c = $t0, $t1, $t2):
1
2
3
4
5
6
7
8
9
10
11
12
13
14
15
16
17
18
.data
true_str: .asciiz "true\n"
.text
li $t8, 10 # get the necessary literals in some unused regs
li $t9, 100
bgt $t0, $t8, do_true # if (a > 10) goto do_true
ble $t2, $t9, done_if # if (c <= 100) goto done_if
blt $t1, $t2, done_if # if (b < c) goto done_if
do_true:
li $v0, 4 # print string
la $a0, true_str # address of str in a0
syscall
done_if:
ori $t1, $t1, 0xAA # b |= 0xAA
If-Else Chain
Ok, let’s look at a larger example. Say you’re trying to determine
a student’s letter grade based on their score. We’re going to need a chain
of if-else-if's to handle all cases. Assume score is declared and
set somewhere before.
1
2
3
4
5
6
7
8
9
10
11
12
13
14
15
16
17
18
19
20
21
22
#include <stdio.h>
int main()
{
int score;
char letter_grade;
printf("Enter your score: ");
scanf("%d", &score);
if (score >= 90) {
letter_grade = 'A';
} else if (score >= 80) {
letter_grade = 'B';
} else if (score >= 70) {
letter_grade = 'C';
} else if (score >= 60) {
letter_grade = 'D';
} else {
letter_grade = 'F';
}
printf("You got a %c\n", letter_grade);
return 0;
}
With chains like these, if you follow everything we’ve learned, it comes out
looking like this (assuming score is $t0 and letter_grade is $t1):
1
2
3
4
5
6
7
8
9
10
11
12
13
14
15
16
17
18
19
20
21
22
23
24
25
26
27
28
29
30
31
32
33
34
35
36
37
38
39
40
41
42
43
44
45
46
47
48
49
50
51
52
.data
prompt: .asciiz "Enter your score: "
grade_str: .asciiz "You got a "
.text
main:
li $v0, 4 # print str
la $a0, prompt
syscall
li $v0, 5 # read int
syscall
move $t0, $v0 # move score into t0
li $t1, 70 # letter_grade default to 'F' ascii value
li $t2, 90
blt $t0, $t2, not_a # if (score < 90) goto not_a
li $t1, 65 # leter_grade = 'A'
j grade_done
not_a:
li $t2, 80
blt $t0, $t2, not_b # if (score < 80) goto not_b
li $t1, 66 # leter_grade = 'B'
j grade_done
not_b:
li $t2, 70
blt $t0, $t2, not_c # if (score < 70) goto not_c
li $t1, 67 # leter_grade = 'C'
j grade_done
not_c:
li $t2, 60
blt $t0, $t2, grade_done # if (score < 60) goto grade_done
li $t1, 68 # leter_grade = 'D'
grade_done:
li $v0, 4 # print str
la $a0, grade_str
syscall
li $v0, 11 # print character
move $a0, $t1 # char to print
syscall
li $a0, 10 # print '\n'
syscall
li $v0, 10 # exit
syscall
You can see how we set a default value and then test for the opposite of each condition to jump to the next test, until we get one that fails (aka was true in the original C condition) and set the appropriate grade.
You can arrange chains like this in either direction, it doesn’t have to match the order of the C code. As long as it works the same, do whatever makes the code simpler and more sensible to you.
Conclusion
Branching and logic and learning to translate from higher level code to assembly is something that takes a lot of practice, but eventually it’ll become second nature. We’ll get more practice in the chapter on looping which naturally also involves branching.
One final note, there’s really no reason to use the slt family of opcodes unless
your professor requires it, ie he says you can’t use pseudoinstructions so you’re
left with beq, bne, j and the slt ops. I’ll show how you can code without
using pseudoinstructions in a later chapter.
Exercises
-
Convert the following C code to MIPS.
1 2 3 4 5 6 7 8 9 10 11 12 13 14 15 16 17 18
#include <stdio.h> int main() { int num; printf("Enter an integer: "); scanf("%d", &num); if (num > 50) { puts("The number is greater than 50"); } else if (num < 50) { puts("The number is less than 50"); } else { puts("You entered 50!"); } return 0; }
-
Prompt for the user’s name, then tell them whether their name starts with a letter from the first or second half of the alphabet. Be sure to handle both upper and lower case correctly, but assume they entered a valid letter.
Chapter 4: Loops
"Insanity is doing the same thing over and over again and expecting different results."
Often misattributed to Albert Einstein
Before we get into the MIPS, I want to cover something that may be obvious to some but
may have never occurred to others. Any loop structure can be converted to any other
(possibly with the addition of an if statement). So a for can be written as a while
and vice versa. Even a do-while can be written as a for or while loop. Let’s look
at some equivalencies.
 1
 2
 3
 4
 5
 6
 7
 8
 9
10
11
12
13
14
15
16
17
18	for (int i=0; i<a; i++) {
		do_something;
	}

	int i = 0;
	while (i < a) {
		do_something;
		i++;
	}

	int i = 0;
	if (i < a) {
		do {
			do_something;
			i++;
		} while (i < a);
	}
	// you could also have an if (i >= a) goto loop_done; to jump over do-while
In general, when writing assembly, it can help to think more in terms of while or
do-while rather than for because the former more closely resemble what the
assembly looks like in terms of what goes where. Like in the last chapter,
where we would think of the if-else statements in "jump-form" or "branch-form",
we can do the same here, converting for to while in our head as an intermediary
step before going to assembly.
Speaking of "jump-form", lets apply it to the loop above:
 1
 2
 3
 4
 5
 6
 7
 8
 9
10	int i=0;
	if (i >= a)
		goto done_loop;
loop:
	do_something;
	i++
	if (i < a)
		goto loop;

done_loop:
You can see how that starts to look more like assembly. Another thing to note is that
unlike with if statements where we test for the opposite to jump over the block of code,
when you’re doing the loop test at the bottom like with a do-while, it is unchanged
from C because you are jumping to continue the loop. If you put the test at the top it
becomes inverted, and you put an unconditional jump at the bottom:
1
2
3
4
5
6
7
8
9	int i=0;
loop:
	if (i >= a)
		goto done_loop;
	do_something;
	i++
	goto loop:

done_loop:
In general it’s better to test at the bottom, both because the condition matches
the higher level form, and because when you know the loop is going to execute at least once it requires
only one jump + label, rather than 2 since you can forgo the the initial if check:
 1
 2
 3
 4
 5
 6
 7
 8
 9
10
11	for (int i=0; i<10; i++)
		do_something;

	// becomes

	int i=0;
loop:
	do_something;
	i++
	if (i < 10)
		goto loop;
Ok, now that we’ve got the theory and structure out of the way, let’s try doing a simple one in MIPS.
1
2
3
4	int sum = 0;
	for (int i=0; i<100; i++) {
		sum += i;
	}
That’s about as basic as it gets, adding up the numbers 0 to 99.
1
2
3
4
5
6
7	li    $t0, 0   # sum = 0
	li    $t1, 1   # i = 1  we can start at 1 because obviously adding 0 is pointless
	li    $t2, 100
loop:
	addi  $t0, $t0, $t1    # sum += i
	addi  $t1, $t1, 1      # i++
	blt   $t1, $t2, loop   # while (i < 100)
Ok I don’t think there’s much point in doing any more without getting to what loops are most often used for, looping through data structures, most commonly arrays.
Looping Through Arrays
Looping and arrays go together like peanut butter and jam. An array is a sequence of variables of the same type, almost always related in some way. Naturally, you want to operate on them all together in various ways; sorting, searching, accumulating, etc. Given that the only way to do that is with loops, in this section we’ll cover different ways of looping through arrays, including multidimensional arrays.
1D Arrays
Let’s pretend there’s an array int numbers[10]; filled with 10 random numbers.
1
2
3
4	int total = 0;
	for (int i=0; i<10; i++) {
		total += numbers[i];
	}
There are several ways to do this. The first is the most literal translation.
 1
 2
 3
 4
 5
 6
 7
 8
 9
10
11
12	li    $t0, 0     # total = 0
	li    $t1, 0     # i = 0
	la    $t2, numbers   # t2 = numbers
	li    $t3, 10
sum_loop:
	sll   $t4, $t1, 2    # t4 = i*sizeof(int) == i*4
	add   $t4, $t4, $t2  # t4 = &numbers[i]
	lw    $t4, 0($t4)    # t4 = numbers[i]
	add   $t0, $t0, $t4  # total += numbers[i]

	addi  $t1, $t1, 1    # i++
	blt   $t1, $t3, sum_loop   # while (i < 10)
We initialize the relevant variables beforehand (numbers and 10 could be loaded
every iteration but that’s less efficient). Now what’s with the i*4? We already
discussed using shifts to multiply and divide by powers of 2 in a previous chapter,
but here we’re doing something that higher level languages do automatically for you
every time you do an array access. When you access the i'th element, under the hood
it is multiplying i by the size of the type of the array and adding that number of
bytes to the base address and then loading the element located there.
If you’re unfamiliar with the C syntax in the comments, & means "address of", so
$t4 is being set to the address of the i'th element. Actually that C syntax is
redundant because the the & counteracts the brackets. In C adding a number to a
pointer does pointer math (ie it multiplies by the size of the items as discussed
above). This means that the following comparison is true:
&numbers[i] == numbers + i
which means that this is true too
&numbers[0] == numbers
The reason I use the form on the left in C/C++ even when I can use the right is it makes it more explicit and obvious that I’m getting the address of an element of an array. If you were scanning the code quickly and saw the expression on the right, you might not realize that’s an address at all, it could be some mathematical expression (though the array name would hopefully clue you in if it was picked well).
Anyway, back to the MIPS code. After we get the address of the element we want, we
have to actually read it from memory (ie load it). Since it’s an array of words
(aka 4 byte ints) we can use load word, lw.
Finally, we add that value to total, increment i, and perform the loop check.
Now, I said at the beginning that this was the most literal, direct translation
(not counting the restructuring to a do-while form). However, it is not my preferred
form because it’s not the simplest, nor the shortest.
Rather than calculate the element address every iteration, why not keep a pointer to the current element and iterate through the array with it? In C what I’m suggesting is this:
1
2
3
4
5
6
7	int* p = &numbers[0];
	int i = 0, total = 0;
	do {
		total += *p;
		i++;
		p++;
	} while (i < 10);
In other words, we set p to point at the first element and then increment it every
step to keep it pointing at numbers[i]. Again, all mathematical operations on pointers
in C deal in increments of the byte syze of the type, so p++ is really adding 1*sizeof(int).
 1
 2
 3
 4
 5
 6
 7
 8
 9
10
11	li    $t0, 0     # total = 0
	li    $t1, 0     # i = 0
	la    $t2, numbers   # p = numbers
	li    $t3, 10
sum_loop:
	lw    $t4, 0($t2)    # t4 = *p
	add   $t0, $t0, $t4  # total += *p

	addi  $t1, $t1, 1    # i++
	addi  $t2, $t2, 4    # p++  ie p += sizeof(int)
	blt   $t1, $t3, sum_loop   # while (i < 10)
Now, that may not look much better, we only saved 1 instuction, and if we were
looping through a string (aka an array of characters, sizeof(char) == 1) we wouldn’t
have saved any. However, imagine if we weren’t using sll to do the multiply but
mult. That would take 3 instructions, not 1. Even mul would take 2. Remember
we would have to use one of those if we were iterating through an array of
structures with a size that wasn’t a power of 2.
However, there is one more variant that you can use that can save a few more instructions.
Instead of using i and i<10 to control the loop, use p and the address just past the
end of the array. In C it would be this:
1
2
3
4
5
6
7	int* p = &numbers[0];
	int* end = &numbers[10];
	int total = 0;
	do {
		total += *p;
		p++;
	} while (p < end);
You could also use != instead of <. This is similar to using the .end() method
on many C++ data structures when using iterators. Now the MIPS version:
1
2
3
4
5
6
7
8
9	li    $t0, 0     # total = 0
	la    $t2, numbers   # p = numbers
	addi  $t3, $t2, 40   # end = &numbers[10] = numbers + 10*sizeof(int)
sum_loop:
	lw    $t4, 0($t2)    # t4 = *p
	add   $t0, $t0, $t4  # total += *p

	addi  $t2, $t2, 4    # p++  ie p += sizeof(int)
	blt   $t2, $t3, sum_loop   # while (p < end)
So we dropped from 10 to 7 instructions and even more if we had had to do mul
or mult originally. And this was for a 1D array. Imagine if you had 2
or 3 indices you had to use to calculate the correct offset. That’s what
we go over in the next section.
2D Arrays
The first thing to understand is what’s really happening when you declare a 2D array in C. The contents of a 2D array are tightly packed, in row-major order, meaning that all the elements from the first row are followed by all the elements of the second row and so on. What this means is that a 2D array is equivalent to a 1D array with rows*cols elements in the same order:
1
2
3
4
5	#define ROWS 2
	#define COLS 4
	// The memory of these two arrays are identical
	int array[ROWS][COLS] = { { 1, 2, 3, 4 }, { 5, 6, 7, 8 } };
	int array1d[ROWS*COLS] = { 1, 2, 3, 4, 5, 6, 7, 8 };
See the code example 2d_arrays.c for more details.
What this means is that when we declare a 2D array, it’s basically a 1D array with the size equal to rows * columns. Also, when we loop through a 2D array, we can often treat it like a 1D array with a single loop. So everything that we learned before applies.
Let’s do an example.
 1
 2
 3
 4
 5
 6
 7
 8
 9
10
11
12
13
14	for (int i=0; i<rows; i++) {
		for (int j=0; j<cols; ++j) {
			array[i][j] = i + j;
		}
	}

	// becomes

	int r, c;
	for (int i=0; i<rows*cols; i++) {
		r = i / cols;
		c = i % cols;
		array[i] = r + c;
	}
So assuming rows and cols are in $a0 and $a1 (and nonzero), it would
look like this:
 1
 2
 3
 4
 5
 6
 7
 8
 9
10
11
12
13
14
15	la    $t0, array    # p = &array[0]
	li    $t1, 0        # i = 0
	mult  $a0, $a1      # a0 = rows, a1 = cols
	mflo  $t2           # t2 = rows * cols
loop:
	div   $t1, $a1
	mflo  $t3           # r = i / cols
	mfhi  $t4           # c = i % cols
	add   $t3, $t3, $t4    # t3 = r + c

	sw    $t3, 0($t0)      # array[i] = *p = r + c

	addi  $t1, $t1, 1      # i++
	addi  $t0, $t0, 4      # p++ (keep pointer in sync with i, aka p = &array[i])
	blt   $t1, $t2, loop   # while (i < rows*cols)
You might ask if it’s it worth it to convert it to a single loop when you still
need the original i and j as if you were doing nested loops. Generally, it is
much nicer to avoid nested loops in assembly if you can. There are many cases
when you get the best of both worlds though. If you’re doing a clear for example,
setting the entire array to a single value, there’s no need to calculate the row
and column like we did here. I only picked this example to show how you could
get them back if you needed them.
For comparison here’s the nested translation (while still taking advantage of the 1D arrangement of memory and pointer iterators):
 1
 2
 3
 4
 5
 6
 7
 8
 9
10
11
12
13
14	la    $t0, array    # p = &array[0]
	li    $t1, 0        # i = 0
looprows:
	li    $t2, 0        # j = 0
loopcols:
	add   $t3, $t1, $t2    # t3 = i + j
	sw    $t3, 0($t0)      # array[i][j] = *p = i + j

	addi  $t2, $t2, 1         # j++
	addi  $t0, $t0, 4         # p++ (keep pointer in sync with i and j, aka p = &array[i][j])
	blt   $t2, $a1, loopcols  # while (j < cols)

	addi  $t1, $t1, 1          # i++
	blt   $t1, $a0, looprows   # while (i < rows)
It’s a bit shorter but again, how much are the extra label and branch worth? For me, this one’s a toss up. On the other hand, either of the last 2 versions are better than the literal translation below:
 1
 2
 3
 4
 5
 6
 7
 8
 9
10
11
12
13
14
15
16
17
18
19
20
21
22
23	la    $t0, array    # p = &array[0]
	li    $t1, 0        # i = 0
looprows:
	li    $t2, 0        # j = 0
loopcols:
	add   $t3, $t1, $t2    # t3 = i + j

	# need to calculate the byte offset of element array[i][j]
	mult  $t1, $a1
	mflo  $t4              # i * cols

	add   $t4, $t4, $t2    # t4 = i * cols + j

	sll   $t4  $t4, 2      # t4 = (i * cols + j) * sizeof(int)
	add   $t4, $t4, $t0    # t4 = &array[i][j] (calculated as array + (i*cols + j)*4)

	sw    $t3, 0($t4)      # array[i][j] = i + j

	addi  $t2, $t2, 1         # j++
	blt   $t2, $a1, loopcols  # while (j < cols)

	addi  $t1, $t1, 1          # i++
	blt   $t1, $a0, looprows   # while (i < rows)
That chunk in the middle calculating the offset of every element? Not only is it far slower than iterating the pointer through the array, but you can imagine how much worse it would be for a 3D array with 3 nested loops.
Conclusion
Hopefully after those examples you have a more solid understanding of looping in MIPS and how to transform various loops and array accesses into the form that makes your life the easiest. There is more we could cover here, like looping through a linked list, but I think that’s beyond the scope of what we’ve covered so far. Perhaps in a later chapter.
Exercises
-
Convert the following C code to MIPS. If using SPIM, you can just hard code a "random" number between 0 and 100.
1 2 3 4 5 6 7 8 9 10 11 12 13 14 15 16 17 18 19 20 21 22 23 24 25
#include <stdio.h> #include <stdlib.h> int main() { int num = rand() % 101 int guess; puts("I'm thinking of a number 0-100. Try to guess it!"); while (1) { printf("Guess a number: "); scanf("%d", &guess); if (guess > num) { puts("Too high!"); } else if (guess < num) { puts("Too low!"); } else { break; } } printf("Correct, it was %d!\n", num); return 0; }
-
Write a MIPS program to find and print the average of the following array. Use integer division.
1 2
.data array: .word 93,8,78,-6,51,49,3,2,128,0
-
Write a program to find the min and max of the array in the previous exercise
Chapter 5: Functions and the MIPS Calling Convention
While I’m sure everyone here probably knows what functions are, you might be wondering what a "Calling Convention" is. In short, it is an agreement between the caller and callee about how to treat/use certain registers. We’ll get to the why and how later.
Functions
In assembly, a function is simply a label with a return instruction associated with it; because this is far more ambiguous than a function in a higher level language, it is good practice to only have a single return instruction associated with a function.[8] A comment above the label is also helpful. Together those help you quickly see the start and end of the function.
1void func1() {}
would be
1
2
3
4
# void func1()
func1:
# body goes here
jr $ra
As you can see my policy is to put a single line comment of the C prototype above label.
But how do you call a function in assembly? You use the instruction Jump and Link:
jal func_label.
Let’s change the hello world program from chapter 0 to call a function:
1
2
3
4
5
6
7
8
9
10
11
12
13
14
15
16
17
18
.data
hello: .asciiz "Hello World!\n"
.text
main:
jal hello_world
li $v0, 10 # exit syscall
syscall
# void hello_world()
hello_world:
li $v0, 4 # print string system call
la $a0, hello # load address of string to print into a0
syscall
jr $ra
What jal actually does, is save the address of the next instruction to $ra
and then do an unconditional jump to the function label. So you could achieve
the same results with the following:
	jal    func

	# is equivalent to

	la     $ra, next_instr
	j      func
next_instr:
That would get tiring and ugly fast though, having to come up with unique labels
for the next instruction every time. You also might be confused about why the
greensheet says jal saves PC+8 in $ra instead of PC+4. The reason
is that MIPS technically has delayed branching, i.e. a single instruction after
every branch instruction is executed before the jump actually happens. So jal
adds 8 instead of 4 to account for that extra instruction delay. However,
every simulator we’ve mentioned does non-delayed branching by default so you
can ignore it.
The Convention
We’ve gone as far as we can without starting to talk about registers and their purposes in functions. You can think of registers as variables[9] that are part of the CPU. In this case, since we’re dealing with a 32-bit MIPS architecture, they are 32-bit (aka 4 bytes, 1 word) variables. Since they’re part of the CPU, they exist for the life of the program and the whole program shares the same registers.
But how does that work? If all parts of the program use the same
32 registers, how does one function not stomp all over what another was doing
when it uses them? In fact, how do functions communicate at all? How do they
pass arguments or return results? All these questions are solved by deciding
on a "Calling Convention". It’s different for different architectures and even
different operating systems on the same architecture. This is because different
architectures have different numbers of registers, and some registers like $ra
have hardcoded uses. The op jal modifies $ra, and $0 is a constant 0 and
there’s no way to change either of those facts. That still leaves a lot of
flexibility when designing a calling convention. While they mostly match,
you’ll find several variations of MIPS calling conventions online. They
usually differ in how they setup a stack frame. The convention covered
in this chapter is consistent with, and sufficient for, almost every college
course I’ve ever heard of.
Regardless, what matters is that the calling convention works by setting rules (and guidelines) for register use, and when/how to use the stack.
If you’re unfamiliar with the
runtime stack, it’s exactly what it sounds like. It’s a Last-In-First-Out (LIFO)
data structure that you can use to store smaller values in a program. It grows
in a negative direction, so to allocate 12 bytes, you would subtract 12 from the
stack pointer (in MIPS that’s $sp).
MIPS specifically designates certain registers to be used for passing arguments
(at least the first 4), others for return values, and others for misc. temporary
or saved values. The rest are special use registers like $ra.
The quickest way to summarize is to look at the table on the greensheet which is reproduced (with some modifications) below:
| Name | Number | Use | Preserved Across a Call |
|---|---|---|---|
$zero |
0 |
Constant 0 |
N.A. |
$at |
1 |
Assembler Temporary (used to expand pseudo-ops) |
No |
$v0-$v1 |
2-3 |
Function Results and Expression Evaluation |
No |
$a0-$a3 |
4-7 |
Arguments |
No |
$t0-$t7 |
8-15 |
Temporaries |
No |
$s0-$s7 |
16-23 |
Saved Temporaries |
Yes |
$t8-$t9 |
24-25 |
Temporaries |
No |
$k0-$k1 |
26-27 |
Reserved for OS Kernel |
No |
$gp |
28 |
Global Pointer |
Yes |
$sp |
29 |
Stack Pointer |
Yes |
$fp (or $s8) |
30 |
Frame Pointer if necessary or can be another saved reg |
Yes |
$ra |
31 |
Return Address |
No |
To summarize, you have 16 registers that can be used anytime for temporary
values, though some have special uses too (the v, a, and t registers).
You have 8 s registers that have to be saved on the stack if you use
them, plus $ra as well. The $zero register is obviously a special case.
The $sp register is technically preserved but not in the same way. Basically
what you allocate (subtract) you have to deallocate (add) before returning
from a function, thus preserving the original value.
You can ignore $at, $k0-$k1, $gp and most of the time $fp too. In over 7 years
of tutoring I’ve helped students with MIPS from at least 2 dozen different colleges
and I think I’ve only seen a professor force his students to use $fp
or pass more than 4 arguments twice. You can see[10] register 30 sometimes
referred to as $s8 rather than, or in addition to, $fp which shows you how rarely
it’s actually used/needed as a frame pointer.
Basic example
Let’s start with something simple that doesn’t use the stack.
int hello_name_number(char* name, int number)
{
	printf("Hello %s!\n", name);
	return number + 10;
}
According to the convention that becomes:
1
2
3
4
5
6
7
8
9
10
11
12
13
14
15
16
17
18
19
20
21
22
.data
hello_space: .asciiz "Hello "
exclaim_nl: .asciiz "!\n"
.text
# int hello_name_number(char* name, int number)
hello_name_number:
move $t0, $a0 # save name in t0 since we need a0 for the syscall
li $v0, 4 # print string
la $a0, hello_space
syscall
move $a0, $t0 # print name (v0 is still 4)
syscall
la $a0, exclaim_nl # print "!\n"
syscall
addi $v0, $a1, 10 # return number + 10
jr $ra
Some things to note, syscalls are not function calls so we can "save" $a0 in
a t register and know that it’ll still be there when the syscall is done. In the
same way, we know that $v0 is still the same so we don’t have to keep setting
it to 4 for print string. Lastly, to return a value, we make sure that value
is in $v0 before returning.
Using the Stack
First, let’s establish the rules on when you have to use the stack (You can always use it for arbitrary local variables, like a local array for example, but generally don’t if you don’t have a good reason).
-
You call another function, ie you’re a non-leaf function.
This means you have to save
$raon the stack at the very least, otherwise when you do yourjr $rayou’d jump back into yourself (right after the lastjalinstruction). This does not apply to main because you don’t/shouldn’t return from main, you should call the exit (or exit2) syscall (10 or 17). -
You need to save values across a function call (automatically includes reason 1).
This is fairly common for non-trivial functions. Obvious examples are calling a function in a loop or loops (you’d have to preserve the iterator(s)), and many recursive functions.
-
You run out of temporary registers and overflow into the s registers.
This is very rare. The most common reason this "happens" is people forget they have 10 t registers instead of 8 like s registers and even if they remember that they forget they can also use the a and v registers for temporaries. 16 is more than enough to handle pretty much any function because you rarely need 17 discrete values at the same time.
Let’s look at an example for the first two. Any example for the last rule would be prohibitively large and complicated.
1
2
3
4
5
int non_leaf()
{
func1();
return 42
}
This calls the empty function discussed at the top of this chapter.
1
2
3
4
5
6
7
8
9
10
11
12
#int non_leaf()
non_leaf:
addi $sp, $sp, -4 # space to save 1 register, $ra
sw $ra, 0($sp) # store $ra in the newly allocated stack space
jal func1
li $v0, 42 # return 42
lw $ra, 0($sp) # restore original $ra
addi $sp, $sp, 4 # pop the stack
jr $ra
The bit of code at the top and bottom of the function are called the prologue
and epilogue respectively for obvious reasons. We allocate 4 bytes on the stack
by subtracting 4 (I add a negative rather than subtract
because I can copy-paste the line with a single character change for the
epilogue). Then we store the current $ra in that space at the new top of the
stack. Then before we exit we have to load it back and pop the stack.
If we didn’t save and restore $ra we would jump to line 7 when we do our
jr $ra and then we’d be in an infinite loop.
Next we have the second case, where we need to preserve regular local values across a function call.
1
2
3
4
5
6
7
8
9
10
11
12
13
14
15
void print_letters(char letter, int count)
{
for (int i=0; i<count; i++) {
putchar(letter);
}
putchar('\n');
}
int save_vals()
{
for (int i=0; i<10; i++) {
print_letters('A'+i, i+1);
}
return 8;
}
That becomes this in mips:
1
2
3
4
5
6
7
8
9
10
11
12
13
14
15
16
17
18
19
20
21
22
23
24
25
26
27
28
29
30
31
32
33
34
35
36
37
38
#void print_letters(char letter, int count)
print_letters:
ble $a1, $0, exit_pl # if (count <= 0) goto exit_pl
li $v0, 11 # print character
pl_loop:
syscall
addi $a1, $a1, -1 # count--
bgt $a1, $0, pl_loop # while (count > 0)
li $a0, 10 # '\n'
syscall
exit_pl:
jr $ra
#int save_vals()
save_vals:
addi $sp, $sp, -12
sw $ra, 0($sp)
sw $s0, 4($sp)
sw $s1, 8($sp)
li $s0, 0 # i = 0
li $s1, 10
sv_loop:
addi $a0, $s0, 65 # i + 'A'
addi $a1, $s0, 1 # i + 1
jal print_letters
addi $s0, $s0, 1 # i++
blt $s0, $s1, sv_loop # while (i < 10)
lw $ra, 0($sp)
lw $s0, 4($sp)
lw $s1, 8($sp)
addi $sp, $sp, 12
jr $ra
Notice that for print_letters, we not only convert the loop to a do-while, but
we also use the parameter count as the iterator to count down to 0. It saves
us an instruction initializing an i.
Second, for save_vals, we save not only $ra because we call another function,
but also two s registers to save i and our stopping point. The second is not
actually necessary; because it’s a constant, we could load 10 into a register
right before the check every iteration of the loop. Which version is better depends on
several factors, like how long or complex the loop is, how many times it executes, and
of course personal preference.
Recursive Functions
Let’s do a classic recursive function, the fibonacci sequence.
1
2
3
4
5
6
7
int fib(int n)
{
if (n <= 1)
return n;
return fib(n-2) + fib(n-1);
}
You can see how, at the very least, we’ll have to save $ra and n, because we
need the original even after the first recursive call. It’s not as
obvious, but we’ll also have to save the return value of the first call so
we’ll still have it to do the addition after the second. You might think
this would require using two s regs, but does it? Let’s see…
1
2
3
4
5
6
7
8
9
10
11
12
13
14
15
16
17
18
19
20
21
22
23
24
25
26
#int fib(int n)
fib:
addi $sp, $sp, -8
sw $ra, 0($sp)
sw $s0, 4($sp)
move $v0, $a0 # prepare to return n
li $t0, 1
ble $a0, $t0, exit_fib # if (n <= 1) goto exit_fib (ie return n)
move $s0, $a0 # save n
addi $a0, $a0, -2 # a0 = n - 2
jal fib # fib(n-2)
addi $a0, $s0, -1 # a0 = n - 1, prep arg first so we can use s0 to save v0
move $s0, $v0 # save return of fib(n-2) in s0
jal fib # fib(n-1)
add $v0, $v0, $s0 # v0 = fib(n-1) + fib(n-2)
exit_fib:
lw $ra, 0($sp)
lw $s0, 4($sp)
addi $sp, $sp, 8
jr $ra
Notice how we don’t have to save n any sooner than necessary, ie right before
we have to use $a0 to setup the first recursive call. Also, the ordering of
lines 16 and 17 is important. We needed the original n to calculate n-1 but
once that’s in $a0 ready for the call, because we won’t need n again afterward,
we can now use $s0 to preserve the return value of the first call.
Some of you, if you were paying attention, might point out that you could save a few instructions of performance if you moved the base case testing before the prologue as long as you put the exit label after the epilogue. This is true, but I’d recommend against it unless you were really trying to eke out every last microsecond. It’s nicer/cleaner to keep the prologue and epilogue as the first and last things; they’re one more thing to catch your eye and help delineate where functions start and end. Regardless, if you’re curious, you can see that version, along with every other function in this chapter in the included program calling.s.
Conclusion
While grasping the basics of a calling convention is not too difficult, it takes
practice to get used to it. There are many things that we haven’t covered
in this chapter, like how to pass more than 4 arguments, or use $fp, or handle
floating point arguments or return values. The latter at least, will be covered in
the next chapter.
Exercises
-
Implement the following functions in MIPS and write a program to demonstrate their use. You can reuse much of your code from the previous chapter’s exercises.
1 2 3 4 5 6 7 8 9 10
// return the min or max int get_min(int* array, int size); int get_max(int* array, int size); // return the index of the min/max int locate_min(int* array, int size); int locate_max(int* array, int size); // return the average of the array int calc_average(int* array, int size);
-
The Collatz conjecture is defined as follows: start with any positive integer n, if n is even, divide by 2, otherwise, multiply by 3 and add 1. The conjecture is that all sequences will eventually reach 1. Write 2 versions of the collatz function, one iterative and one recursive. Print out the sequence as they go.
1 2 3 4 5 6 7
void collatz_iterative(int n); void collatz_recursive(int n); // for an added challenge return the number of steps taken to reach 1 // you can remove the printing of the steps int collatz_iterative2(int n); int collatz_recursive2(int n);
Chapter 6: Floating Point Types
Up to this point we haven’t really mentioned floating point values or instructions
at all, except how to declare them in the .data section and the syscalls for
reading and printing them. There are two reasons we’ve left them alone till now.
First, they use a whole separate set of registers and instructions. Second, and
partly because of the first reason, most MIPS college courses do not ever require
you to know or use floating point values. Since this book is targeted at college
students, if you know you won’t need to know this feel free to skip this chapter.
Floating Point Registers and Instructions
While the greensheet contains a nice table for the normal registers it is completely lacking for the floating point registers. There are 32 32-bit floating point registers. You can use them all for floats but they are paired even-odd for doubles. In other words, you can only use even numbers for doubles, because storing a double at $f0 actually uses $f0 and $f1 because it takes 64 bits/8 bytes.
As far as the calling conventions for floating point registers, it is actually hard to find anything definitive and clear even for the basics. You could make up your own but the float/double syscalls, and the tiny code snippet in Patterson and Hennessy were at least consistent with this old website[11] so we’ll go with that. I have seen at least one course page where the prof wanted all float registers preserved which seems excessive and ridiculous but prof’s are gonna prof.
| Name | Use | Preserved Across a Call |
|---|---|---|
$f0-$f2 |
Function Results |
No |
$f4-$f10 |
Temporaries |
No |
$f12-f14 |
Arguments |
No |
$f16-f18 |
Temporaries |
No |
$f20-f30 |
Saved Temporaries |
Yes |
This table is based on doubles so it may look like it’s skipping odd registers but
they’re included where the even they’re paired with is. So, for example you actually
have 4 registers for float arguments $f12 through $f15 but only 2 for doubles
$f12 and $f14. Similarly you have 12 saved registers for floats but 6 for doubles.
You might find things like
this, which seems
to say that SPIM doesn’t support using the odd registers at all but both example
programs for this chapter use $f1 and work with both SPIM and MARS. Given that,
and the fact that it references instructions [l.d] and [l.s] which don’t work
(li.s and li.d do, see below), it’s probably really out of date.
Most of the next table is actually on the Greensheet but not all of it and I thought it worth reproducing here.
| Name | Opcode | Format | Operation |
|---|---|---|---|
Load Word to Coprocessor 1 |
lwc1 (or l.s) |
|
F[ft] = M[R[rs]+n] |
Store Word from Coprocessor 1 |
swc1 (or s.s) |
|
M[R[rs]+n] = F[ft] |
Load Double to Coprocessor 1 |
ldc1 (or l.d) |
|
F[ft] = M[R[rs]+n] F[ft+1] = M[R[rs]+n+4] |
Store Double from Coprocessor 1 |
sdc1 (or s.d) |
|
M[R[rs]+n] = F[ft] M[R[rs]+n+4] = F[ft+1] |
Move From Coprocessor 1 |
mfc1 |
|
R[rd] = F[fs] |
Move To Coprocessor 1 |
mtc1 |
|
F[fs] = R[rd] |
Convert Word To Single Precision |
cvt.s.w |
|
F[fd] = (float)F[fs] |
Convert Single Precision To Word |
cvt.w.s |
|
F[fd] = (int)F[fs] |
Convert Word To Double Precision |
cvt.d.w |
|
F[fd] = (double)F[fs] |
Convert Double Precision To Word |
cvt.w.d |
|
F[fd] = (int)F[fs] |
Branch on FP True |
bc1t |
|
if (FPcond) goto label; |
Branch on FP False |
bc1f |
|
if (!FPcond) goto label; |
FP Compare |
c.y.x |
|
FPcond = (F[fs] op F[ft]) ? 1 : 0 |
Absolute Value |
abs.x |
|
F[fs] = (F[ft] > 0) ? F[ft] : -F[ft] |
Add |
add.x |
|
F[fd] = F[fs] + F[ft] |
Subtract |
sub.x |
|
F[fd] = F[fs] - F[ft] |
Multiply |
mul.x |
|
F[fd] = F[fs] * F[ft] |
Divide |
div.x |
|
F[fd] = F[fs] / F[ft] |
Negation |
neg.x |
|
F[fs] = -F[ft] |
Move |
mov.x |
|
F[fd] = F[fs] |
With all of the opcodes that end in .x, the x is either s for single precision or d for double precision.
The y in the Compare instructions are one of eq, lt, le. Naturally op would be the matching ==, <, ⇐. Unfortunately, you don’t get not equal, greater than, or greater equal, even as pseudoinstructions, but it’s easy enough to flip the order of operands or branch on the opposite result.
Practice
We’re going to briefly go over some of the more different aspects of dealing with floating point numbers, but since most of it is the same but with a new set of registers and calling convention, we won’t be rehashing most concepts.
Getting Floating Point Literals
The first thing to know when dealing with floats is how to get float (or double) literals into registers where you can actually operate on them.
There are two ways. The first, and simpler way, is to declare them as globals
and then use the lwc1 or ldw1 instructions:
1
2
3
4
5
6
7
8
9
10
11
12
13
14
.data
a: .float 3.14159
b: .double 1.61
.text
main:
la $t0, a
lwc1 $f0, 0($t0) # get a into $f0
la $t0, b
ldc1 $f2, 0($t0) # get b into $f2-3
# other code here
The second way is to use the regular registers and convert the values. Of course this means unless you want an integer value, you’d have to actually do it twice and divide, and even that would limit you to rational numbers. It looks like this.
1
2
3
4
5
6	mtc1    $0, $f0     # move 0 to $f0 (0 integer == 0.0 float)

	# get 4 to 4.0 in $f2
	li       $t0, 4
	mtc1     $t0, $f2
	cvt.s.w  $f2, $f2   # convert 4 to 4.0
As you can see, other than 0 which is a special case, it requires at least 3 instructions, more than the 2 (or 1 if you load directly from the address) of the first method.
|
Note
|
There is a 3rd way that is even easier, but it’s only supported in SPIM. The
pseudoinstructions li.s and li.d work exactly like li except to load float
and double literals into float/double registers.
|
Branching
Branching based on floating point values is slightly different than normal. Instead of being able to test and jump in a single convenient instruction, you have to test first and then jump in a second instruction if the test was true or not. This is the same way x86 does it. The test sets a special control/flag register (or a certain bit or bits in the register) and then all jumps are based on its state.
Using it looks like this:
 1
 2
 3
 4
 5
 6
 7
 8
 9
10
11	c.lt.s  $f0, $f2   # fpcond = f0 < f2
	bc1t    was_less   # if (f0 < f2) goto was_less

	# do something for f0 >= f2

	j       blah
was_less:

	# do something for f0 < f2

blah:
Functions
Finally, lets do a simple example of writing a function that takes a float and returns a float. I’m not going to bother doing one for doubles because it’d be effectively the same, or doing one that requires the stack, because the only differences from normal are a new set of registers and knowing which ones to save or not from the table above.
So, how about a function to convert a fahrenheit temperature to celsius:
1
2
3
4
5
6
7
8
9
10
11
12
13
14
15
16
17
18
19
20
21
22
.data
# 5/9 = 0.5 with 5 repeating
fahrenheit2celsius: .float 0.5555555
.text
# float convert_F2C(float degrees_f)
convert_F2C:
la $t0, fahrenheit2celsius
lwc1 $f0, 0($t0) # get conversion factor
# C = (F - 32) * 5/9
li $t0, 32
mtc1 $t0, $f1 # move int 32 to f1
cvt.s.w $f1, $f1 # convert to 32.0
sub.s $f12, $f12, $f1 # f12 = degrees - 32
mul.s $f0, $f0, $f12 # f0 = 0.555555 * f12
jr $ra
You can see we follow the convention with the argument coming in $f12 and the
result being returned in $f0. In this function we use both methods for getting
a value into float registers; one we load from memory and the other, being
an integer, we move and convert.
Conclusion
As I said before, it is rare for courses to even bother covering floating point instructions or assign any homework or projects that use them, but hopefully this brief overview, combined with the knowledge of previous chapters is sufficient.
There are also 2 example programs conversions.s and calc_pi.s for you to study.
Chapter 7: Tips and Tricks
This chapter is a grab bag of things you can do to improve your MIPS programs and make your life easier.
Formatting
You may have noticed I have a general format I like to follow when writing MIPS (or any) assembly. The guidelines I use are the following
-
1 indent for all code excluding labels/macros/constants.
I use hard tabs set to a width of 4 but it really doesn’t matter as long as it’s just 1 indent according to your preferences.
-
Use spaces to align the first operand of all instructions out far enough.
Given my 4 space tabs, this means column 13+ (due to syscall, though I often stop at 11). The reason to use spaces is to prevent the circumstances that gave hard tabs a bad name. When you use hard tabs for alignment, rather than indentation, and then someone else opens your code with their tab set to a different width, suddenly everything looks terrible. Thus, tabs for indentation, spaces for alignment. Or as is increasingly common (thanks Python), spaces for everything but I refuse to do that to the poor planet.[12]
-
A comma and a single space between operands.
The simulators don’t actually require the comma but since other assembly languages/assemblers do, you might as well get used to it. Besides I think it’s easier to read with the comma, though that might be me comparing it to passing arguments to a function.
-
Comment every line or group of closely related lines with the purpose.
This is often simply the equivalent C code. You can relax this a little as you get more experience.
-
Use a blank line to separate logically grouped lines of code.
While you can smash everything together vertically, I definitely wouldn’t recommend it, even less than I would in a higher level language.
-
Put the
.datasection at the top, similar to declaring globals in C.There are exceptions for this. When dealing with a larger program with lots of strings, it can be convenient to have multiple
.datasections with the strings you’re using declared close to where you use them. The downside is you have to keep swapping back and forth between.textand.data.
Misc. General Tips
-
Try to use registers starting from 0 and working your way up.
It helps you keep track of where things are (esp. combined with the comments). This can fall apart when you discover you forgot something or need to modify the code later and it’s often not worth changing all the registers you’re already using so you can maintain that nice sequence. When that happens I’ll sometimes just pick the other end of sequence (ie
$t9or$s7) since if it’s out of order I might as well make it obvious. -
Minimize your jumps, labels, and especially your level of nested loops.
This was already covered in the chapters on branching and loops but it bears repeating.
-
In your prologue save
$rafirst, if necessary, then all s regs used starting at$s0.Then copy paste the whole thing to the bottom, move the first line to the bottom and change the number to positive and change all the
swtolw.
func:
	addi    $sp, $sp, -20
	sw      $ra, 0($sp)
	sw      $s0, 4($sp)
	sw      $s1, 8($sp)
	sw      $s2, 12($sp)
	sw      $s3, 16($sp)

	# body of func here that calls another function or functions
	# and needs to preserve 4 values across at least one of those calls

	lw      $ra, 0($sp)
	lw      $s0, 4($sp)
	lw      $s1, 8($sp)
	lw      $s2, 12($sp)
	lw      $s3, 16($sp)
	addi    $sp, $sp, 20
Constants
One of the easiest things you can do to make your programs more readable is to use defined constants in your programs. Both MARS and SPIM have ways of defining constants similar to how C defines macro constants; ie they aren’t "constant variables" that take up space in memory, it’s as if a search+replace was done on them right before assembling the program.
Let’s look at our Hello World program using constants for SPIM and MARS
SPIM:
1
2
3
4
5
6
7
8
9
10
11
12
13
14
sys_print_str = 4
sys_exit = 10
.data
hello: .asciiz "Hello World!\n"
.text
main:
li $v0, sys_print_str
la $a0, hello # load address of string to print into a0
syscall
li $v0, sys_exit
syscall
MARS:
1
2
3
4
5
6
7
8
9
10
11
12
13
14
.eqv sys_print_str 4
.eqv sys_exit 10
.data
hello: .asciiz "Hello World!\n"
.text
main:
li $v0, sys_print_str
la $a0, hello # load address of string to print into a0
syscall
li $v0, sys_exit
syscall
Macros
MARS supports function style macros that can shorten your code and improve readability in some cases (though I feel it can also make it worse or be a wash).
The syntax looks like this:
1
2
3
4
5
6
7
8
9
10
11
12
.macro macroname
instr1 a, b, c
instr2, b, d
# etc.
.end_macro
# or with parameters
.macro macroname(%arg1)
instr1 a, %arg1
instr2 c, d, e
# etc.
.end_macro
Some common examples are using them to print strings:
1
2
3
4
5
6
7
8
9
10
11
12
13
14
15
16
17
18
19
20
21
22
23
24
25
26
.macro print_str_label(%x)
li $v0, 4
la $a0, %x
syscall
.end_macro
.macro print_str(%str)
.data
str: .asciiz %str
.text
li $v0, 4
la $a0, str
syscall
.end_macro
.data
str1: .asciiz "Hello 1\n"
.text
# in use:
print_str_label(str1)
print_str("Hello World\n")
...
You can see an example program in macros.s.
Unfortunately, as far as I can tell, SPIM does not support function style macros despite what MARS’s documentation implies about using a $ instead of a % for arguments.
Switch-Case Statements
It is relatively common in programming to compare an integral type variable (ie basically any built-in type but float and double) against a bunch of different constants and do something different based on what it matches or if it matches none.
This could be done with a long if-else-if chain, but the longer the chain the more
likely the programmer is to choose a switch-case statement instead.
Here’s a pretty short/simple example in C:
 1
 2
 3
 4
 5
 6
 7
 8
 9
10	printf("Enter your grade (capital): ");
	int grade = getchar();
	switch (grade) {
	case 'A': puts("Excellent job!"); break;
	case 'B': puts("Good job!"); break;
	case 'C': puts("At least you passed?"); break;
	case 'D': puts("Probably should have dropped it..."); break;
	case 'F': puts("Did you even know you were signed up for the class?"); break;
	default: puts("You entered an invalid grade!");
	}
You could translate this to its eqivalent if-else chain and handle it like we
cover in the chapter on branching. However, imagine if this switch statment had
a dozen cases, two dozen etc. The MIPS code for that quickly becomes long and ugly.
So what if we implemented it in MIPS the same way it is semantically in C?
The same way compilers often (but not necessarily) use? Well, before we do that,
what is a switch actually doing? It is jumping to a specific case label based
on the value in the specified variable. It then starts executing, falling through
any other labels, till it hits a break which will jump to the end of the switch
block. If the value does not have its own case label, it will jump to the default
label.
Compilers handle it by creating what’s called a jump table, basically an array of label addresses, and using the variable to calculate an index in the table to use to jump to.
The C eqivalent of that would look like this:
1
2
3
4
5
6
7
8
9
10
11
12
13
14
15
16
17
18
19
20
21
22
23
24
25
26
27
28
29
30
31
32
33
34
35
36
37
38
39
40
41
42
43
44
45
46
47
48
49
50
51
#include <stdio.h>
// This compiles with gcc, uses non-standard extension
// https://gcc.gnu.org/onlinedocs/gcc/Labels-as-Values.html
int main()
{
// jump table
void* switch_table[] =
{ &&a_label, &&b_label, &&c_label, &&d_label, &&default_label, &&f_label };
printf("Enter your grade (capital): ");
int grade = getchar();
grade -= 'A'; // shift to 0
if (grade < 0 || grade > 'F'-'A')
goto default_label;
goto *switch_table[grade];
a_label:
puts("Excellent job!");
goto end_switch;
b_label:
puts("Good job!");
goto end_switch;
c_label:
puts("At least you passed?");
goto end_switch;
d_label:
puts("Probably should have dropped it...");
goto end_switch;
f_label:
puts("Did you even know you were signed up for the class?");
goto end_switch;
default_label:
puts("You entered an invalid grade!");
end_switch:
return 0;
}
The && and goto *var syntax are actually not standard C/C++ but are GNU
extensions that are supported in gcc (naturally) and clang, possibly others.[13]
First, notice how the size of the jump table is the value of the highest valued label
minus the lowest + 1. That’s why we subtract the lowest value to shift the range
to start at 0 for the indexing. Second, any values without labels within that range
are filled with the default_label address. Third, there has to be an initial
check for values outside the range to jump to default otherwise you could get an
error from an invalid access outside of the array’s bounds.
The same program/code in MIPS would look like this:
1
2
3
4
5
6
7
8
9
10
11
12
13
14
15
16
17
18
19
20
21
22
23
24
25
26
27
28
29
30
31
32
33
34
35
36
37
38
39
40
41
42
43
44
45
46
47
48
49
50
51
52
53
54
55
56
57
58
59
60
61
62
63
64
65
66
67
.data
a_str: .asciiz "Excellent job!\n"
b_str: .asciiz "Good job!\n"
c_str: .asciiz "At least you passed?\n"
d_str: .asciiz "Probably should have dropped it...\n"
f_str: .asciiz "Did you even know you were signed up for the class?\n"
invalid_str: .asciiz "You entered an invalid grade!\n"
enter_grade: .asciiz "Enter your grade (capital): "
switch_labels: .word a_label, b_label, c_label, d_label, default_label, f_label
.text
main:
li $v0, 4
la $a0, enter_grade
syscall
li $v0, 12 # read char
syscall
li $t2, 5 # f is at index 5
la $t0, switch_labels
addi $t1, $v0, -65 # t1 = grade - 'A'
blt $t1, $0, default_label # if (grade-'A' < 0) goto default
bgt $t1, $t2, default_label # if (grade-'A' > 5) goto default
sll $t1, $t1, 2 # offset *= 4 (sizeof(word))
add $t0, $t0, $t1 # t0 = switch_labels + byte_offset = &switch_labels[grade-'A']
lw $t0, 0($t0) # load address from jump table
jr $t0 # jump to address
a_label:
la $a0, a_str
j end_switch
b_label:
la $a0, b_str
j end_switch
c_label:
la $a0, c_str
j end_switch
d_label:
la $a0, d_str
j end_switch
f_label:
la $a0, f_str
j end_switch
default_label:
la $a0, invalid_str
end_switch:
li $v0, 4
syscall
li $v0, 10 # exit
syscall
It’s easy to forget that jr does not actually stand for "jump return" or
"jump ra," though it’s almost always used for that purpose. Instead, it stands
for "jump register" and we can use it to do the eqivalent of the computed goto
statement in C.
This example probably wasn’t worth making switch style, because the overhead and extra code of making the table and preparing to jump balanced out or even outweighed the savings of a branch instruction for every case. However, as the number of options increases, the favor tilts toward using a jump table like this as long as the range of values isn’t too sparse. If the range of values is in the 100’s or 1000’s but you only have cases for a dozen or so, then obviously it isn’t worth creating a table that large only to fill it almost entirely with the default label address.
To reiterate, remember it is not about the magnitude of the actual values you’re looking for, only the difference between the highest and lowest because high - low + 1 is the size of your table.
Command Line Arguments
Command line arguments, also known as program arguments, or command line parameters, are strings that are passed to the program on startup. In high level languages like C, they are accessed through the parameters to the main function (naturally):
1
2
3
4
5
6
7
8
9
10
11
12
#include <stdio.h>
int main(int argc, char** argv)
{
printf("There are %d command line arguments:\n", argc);
for (int i=0; i<argc; i++) {
printf("%s\n", argv[i]);
}
return 0;
}
As you can see, argc contains the number of parameters and argv is an array of
those arguments as C strings. If you run this program you’ll get something
like this:
$ ./args 3 random arguments
There are 4 command line arguments:
./args
3
random
arguments
Notice that the first argument is what you actually typed to invoke the program, so you always have at least one argument.
MIPS works the same way. The number of arguments is in $a0 and an array of strings
is in $a1 when main starts. So the same program in MIPS looks like this:
1
2
3
4
5
6
7
8
9
10
11
12
13
14
15
16
17
18
19
20
21
22
23
24
25
26
27
28
29
30
31
32
33
34
35
36
37
38
39
40
.data
there_are: .asciiz "There are "
arguments: .asciiz " command line arguments:\n"
.text
main:
move $t0, $a0 # save argc
li $v0, 4
la $a0, there_are
syscall
move $a0, $t0
li $v0, 1 # print int
syscall
li $v0, 4
la $a0, arguments
syscall
li $t1, 0 # i = 0
j arg_loop_test
arg_loop:
li $v0, 4
lw $a0, 0($a1)
syscall
li $v0, 11
li $a0, 10 # '\n'
syscall
addi $t1, $t1, 1 # i++
addi $a1, $a1, 4 # argv++ ie a1 = &argv[i]
arg_loop_test:
blt $t1, $t0, arg_loop # while (i < argc)
li $v0, 10
syscall
This program works exactly like the C program when using SPIM:
$ spim -file args.s 3 random arguments
SPIM Version 8.0 of January 8, 2010
Copyright 1990-2010, James R. Larus.
All Rights Reserved.
See the file README for a full copyright notice.
Loaded: /usr/lib/spim/exceptions.s
There are 4 command line arguments:
args.s
3
random
arguments
Obviously the commands for SPIM itself are not included but the file name (args.s) takes the place as the "executable".
Unfortunately, MARS works differently, probably because it’s more GUI focused. It does not pass the program/file name as the first argument, so you can actually get 0 arguments:
$ java -jar ~/Mars4_5.jar args.s pa 3 random arguments
MARS 4.5  Copyright 2003-2014 Pete Sanderson and Kenneth Vollmar

There are 3 command line arguments:
3
random
arguments
You can see that you have to pass "pa" (for "program arguments") to indicate that the following strings are arguments. In the GUI, there is an option in "Settings" called "Program arguments provided to MIPS progam" which if selected will add a text box above the Text Segment for you to enter in the arguments to be passed.
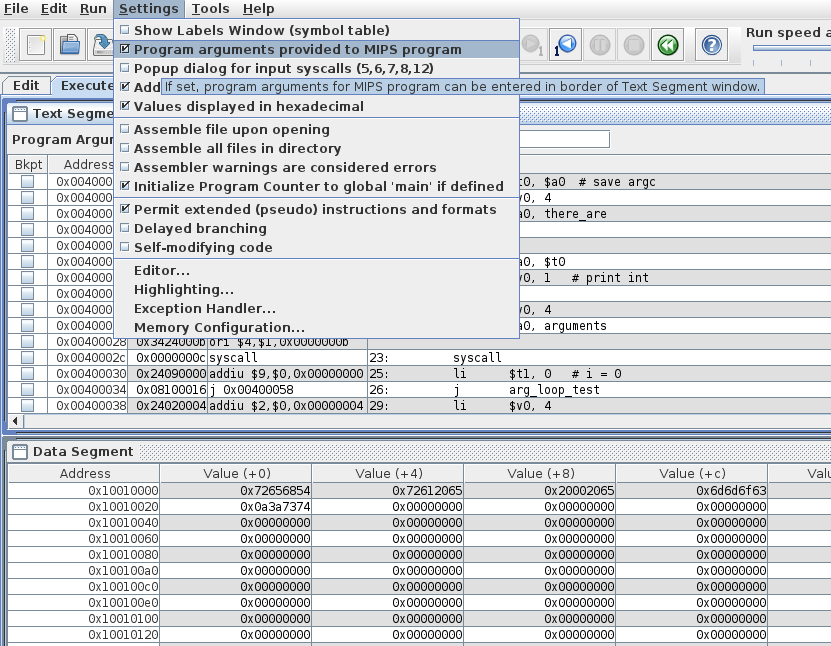
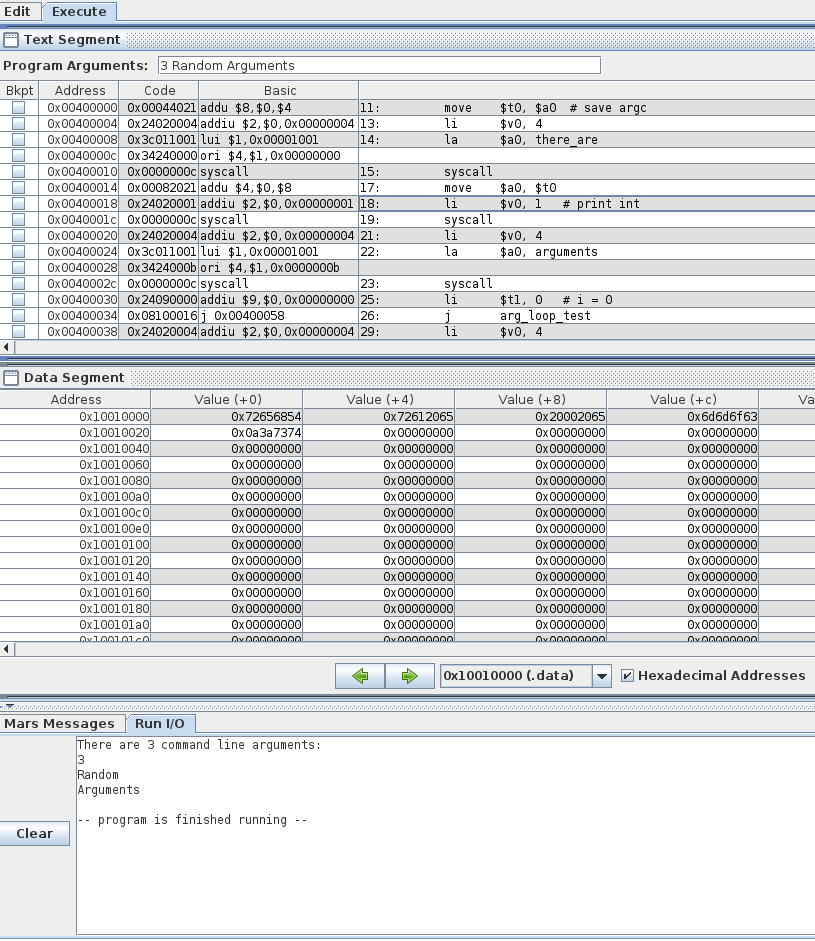
Delayed Branches and Delayed Loads
MIPS originally had a 1-instruction delay between when a branch or load was executed,
and when it actually jumped or completed the load. By default, SPIM has both of
these turned off but you can turn them on with the arguments -delayed_branches
and -delayed_loads respectively, or use the -bare which turns on both, as
well as disabling pseudoinstructions (ie it simulates the "bare" machine without
any of the niceties). MARS is the same as SPIM in that it defaults to the more
user friendly mode, but you can turn on delayed branches in the settings (but
not delayed loads, that isn’t supported as far as I can tell). From the command
line you can turn it on with the db argument and you can turn off pseudoinstructions
with np (for the next section).
The only reason you’d probably ever want to do this to yourself is if your professor requires it for some unknown reason. There is some learning value to seeing how pseudoinstructions are turned into actual instructions, but there’s absolutely nothing useful to be gained in turning on the delays.
To handle delayed branches, all you have to do is add a
nop (No Operation) instruction after every branch or jump instruction
(including jal and jr). The solution is identical for delayed loads, put a
nop after every load instruction.
You could put other instructions there, intsructions that you have above the jumps
or loads that don’t have to occur before. If you were doing a real project on
real hardware and were trying to minimize program size and maximize speed, you
would definitely do this (if that hardware had delayed branches/loads). However,
it’s a bad idea for two reasons. First, it takes longer to figure out which
instructions you can move and why, and it makes your program harder to read since
you naturally don’t expect an instruction to occur before the previous one.
Second, and more importantly, it means your program will no longer work if you
turn delayed branches/loads off again. Using a nop means the change is quick,
easy, and you can still run it in the simulator’s default mode if needed.
One final note, and it relates to the following section. Even though nop
is supposedly represented by all 0’s, and MARS supports it even with pseudoinstrutions
disabled, SPIM does not support it in bare mode. This means you have to use
some other instruction that has no side effects, like or $0, $0, $0, which
will work as a nop under all conditions and simulators.
No Pseudoinstructions Allowed
Far more common than requiring delayed loads is forbidding pseudoinstructions, either all of them, or some subset of them. This forces us to explicitly write what actually happens when you use those pseudoinstructions.
| Pseudoinstruction | Example Use | Equivalence |
|---|---|---|
Load Immediate |
li $t0, 42 |
ori $t0, $0, 42 # or addi $t0, $0, 42 |
Move |
move $t0, $t1 |
or $t0, $0, $t1 # or add $t0, $0, $t1 |
No Operation |
nop |
# anything with $0 as dest # reg will work, I prefer or $0, $0, $0 |
Load Address |
la $t0, label |
# use 0x1001 for MARS lui $t0, 0x1000 ori $t0, $t0, byte_offset |
Branch Less Than |
blt $t0, $t1, label |
# t2 = t0 < t1
slt   $t2, $t0, $t1
bne   $t2, $0, label
# or if you're counting up and # you know they'll be equal, # you can simplify to bne $t0, $t1, label |
Branch Greater Than |
bgt $t0, $t1, label |
# flip order to get > slt $t2, $t1, $t0 bne $t2, $0, label |
Branch Less Than or Equal |
ble $t0, $t1, label |
# test for < and = separately
slt    $t2, $t0, $t1
bne    $t2, $0, label
beq    $t0, $t1, label
# or add 1 to change <= to < # use a spare reg if you need # to preserve the original value addi $t3, $t1, 1 slt $t2, $t0, $t3 bne $t2, $0, label |
Branch Greater Than or Equal |
bge $t0, $t1, label |
# test for opposite # and branch on failure slt $t2, $t0, $t1 beq $t2, $0, label |
You can see how you use the non-pseudoinstructions to match the same behavior, and
there’s often (usually) more than one way. Of all of them, ble is
the worst, because what was 1 instruction becomes 3, and you’ll sometimes need an
extra register to hold the "plus 1" value if you still need the original.
Another thing I should comment on is the la equivalence. The reason it is
a pseudoinstruction in the first place is that an address is 32 bits. That’s also
the size of a whole instruction. Clearly there’s no way to represent a whole
address and anything else at the same time. The lower left corner of the
greensheet has the actual formats of the 3 different types of instructions and
even the jump format still needs 6 bits for the opcode. This is why lui exists,
in order to facilitate getting a full address into a register by doing it in two
halves, 16 + 16. The lower 16 can be placed with addi or ori after the lui.
That begs the question, what actually goes in the upper half? Well, since
we’re dealing with addresses in the .data section, the upper portion should
match the upper part of address of the .data section. In SPIM the data section
starts at 0x10000000 in bare mode. In normal mode it is 0x10010000, but you’d be
able to use la in normal mode. However, in MARS it is always 0x10010000,
so you won’t be able to have it work correctly in bare SPIM and MARS without
changing that back and forth.
But what about the lower part of the address? This involves counting the bytes
from the top of .data to the label you want. If all you have is words, halfs,
floats, doubles, or space (with a round number), that’s fairly easy, but the
second you have strings between the start and the label you want, it’s a bit
more painful. This is why I recommend putting any string declarations at the
bottom so at least any other globals will have nice even offsets. Also, if
you have a bunch of globals, it doesn’t hurt to count once and put the offsets
in comments above each label so you don’t forget. Of course, none of this matters
if you’re allowed to just use la which is true the vast majority of the time.
Let’s look at a small example. We’ll convert the args.s from above (reproduced here for convenience) to bare mode:
1
2
3
4
5
6
7
8
9
10
11
12
13
14
15
16
17
18
19
20
21
22
23
24
25
26
27
28
29
30
31
32
33
34
35
36
37
38
39
40
.data
there_are: .asciiz "There are "
arguments: .asciiz " command line arguments:\n"
.text
main:
move $t0, $a0 # save argc
li $v0, 4
la $a0, there_are
syscall
move $a0, $t0
li $v0, 1 # print int
syscall
li $v0, 4
la $a0, arguments
syscall
li $t1, 0 # i = 0
j arg_loop_test
arg_loop:
li $v0, 4
lw $a0, 0($a1)
syscall
li $v0, 11
li $a0, 10 # '\n'
syscall
addi $t1, $t1, 1 # i++
addi $a1, $a1, 4 # argv++ ie a1 = &argv[i]
arg_loop_test:
blt $t1, $t0, arg_loop # while (i < argc)
li $v0, 10
syscall
So we need to change the moves,li's, la's, and the the j.
after any branches or loads.
1
2
3
4
5
6
7
8
9
10
11
12
13
14
15
16
17
18
19
20
21
22
23
24
25
26
27
28
29
30
31
32
33
34
35
36
37
38
39
40
41
42
43
44
45
46
47
48
49
50
51
52
53
54
55
56
# in bare mode the .data section starts at 0x10000000
# without -bare, spim puts it at 0x10010000, so your lui will change
# but if you weren't doing bare you'd probably just be using la
# MARS .data always starts at 0x10010000, whether pseudoinstructions
# or delayed branching are on or not.
.data
there_are: .asciiz "There are "
arguments: .asciiz " command line arguments:\n"
# run with spim -bare -file args_bare.s
.text
.globl main
main:
or $t0, $0, $a0 # save argc
ori $v0, $0, 4
lui $a0, 0x1000 # there_are is at beginning of data so just lui, lower is 0
syscall
or $a0, $0, $t0
ori $v0, $0, 1 # print int
syscall
ori $v0, $0, 4
lui $a0, 0x1000
ori $a0, $a0, 11 # 11 is length in bytes of "There are " 10 chars + '\0'
#la $a0, arguments
syscall
ori $t1, $0, 0 # i = 0
j arg_loop_test
or $0, $0, $0
arg_loop:
ori $v0, $0, 4 # print string for argv[i]
lw $a0, 0($a1)
or $0, $0, $0 # nop
syscall
ori $v0, $0, 11
ori $a0, $0, 10 # '\n'
syscall
addi $t1, $t1, 1 # i++
addi $a1, $a1, 4 # argv++ ie a1 = &argv[i]
arg_loop_test:
bne $t1, $t0, arg_loop # while (i != argc)
or $0, $0, $0
ori $v0, $0, 10
syscall
Following the table, you can see the mv became or, the li became
ori, we added nop instructions in the form of or with $0 as the destination,
the blt became bne, and lastly the la became lui plus an ori if necessary
for the byte offset. The blt to bne is worth noting, because there’s no
reason to do a complicated transformation if you don’t have to and bne accomplishes
the same thing here.
Exercises
-
Convert the exercises from chapter 5 to run in
spim -baremode and/or in MARS with delayed branches and no pseudoinstructions (java -jar ~/Mars_4.5.jar db np file.son the command line). -
Convert the following C code to MIPS using a jump table (Note in C/C++ enum values start at 0 and go up by one unless the user manually assigns a value, in which case it continues counting up from there).
1 2 3 4 5 6 7 8 9 10 11 12 13 14 15 16 17 18 19 20 21 22 23 24 25 26 27 28 29 30 31 32 33 34 35 36 37 38 39 40
enum { STATE0, STATE1, STATE2, STATE3, STATE14 = 14, STATE42 = 42, STATE43, STATE44 }; int main() { int num; do { printf("Enter a number between 0 and 50: "); scanf("%d", &num); } while (num < 0 || num > 50); switch (num) { case STATE0: puts("Zilch"); break; case STATE1: puts("Uno"); break; case STATE2: puts("Dos"); break; case STATE3: puts("Tres"); break; case STATE14: puts("Catorce"); case STATE42: puts("The answer to life, the universe, and everything."); case STATE43: puts("Off by one"); case STATE44: puts("4 * 11?"); break; } puts("Thanks for playing!"); return 0; }
References and Useful Links
Supporters
Corporate
supporter3 |
Platinum
supporter4 |
supporter5 |
|
supporter7 |
|
|
Gold
Nick, Columbia CS Student |
Dr. Michael Rogers |
|
supporter11 |
supporter12 |
supporter13 |
Silver
Atlas Gong |
supporter15 |
supporter16 |
supporter17 |
supporter18 |
supporter19 |
supporter20 |
|
|
Bronze
supporter22 |
supporter23 |
|
supporter24 |
supporter25 |
supporter26 |
supporter27 |
supporter28 |
supporter29 |
supporter30 |
|
|